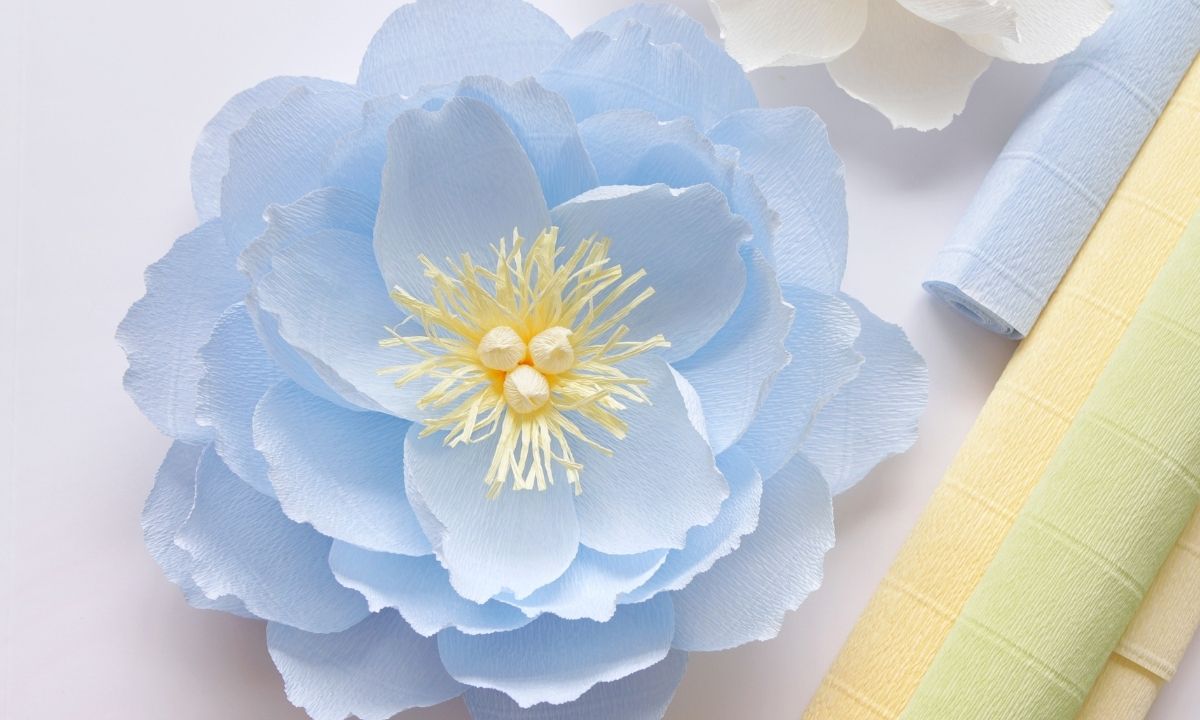

Today let’s talk about the basics.
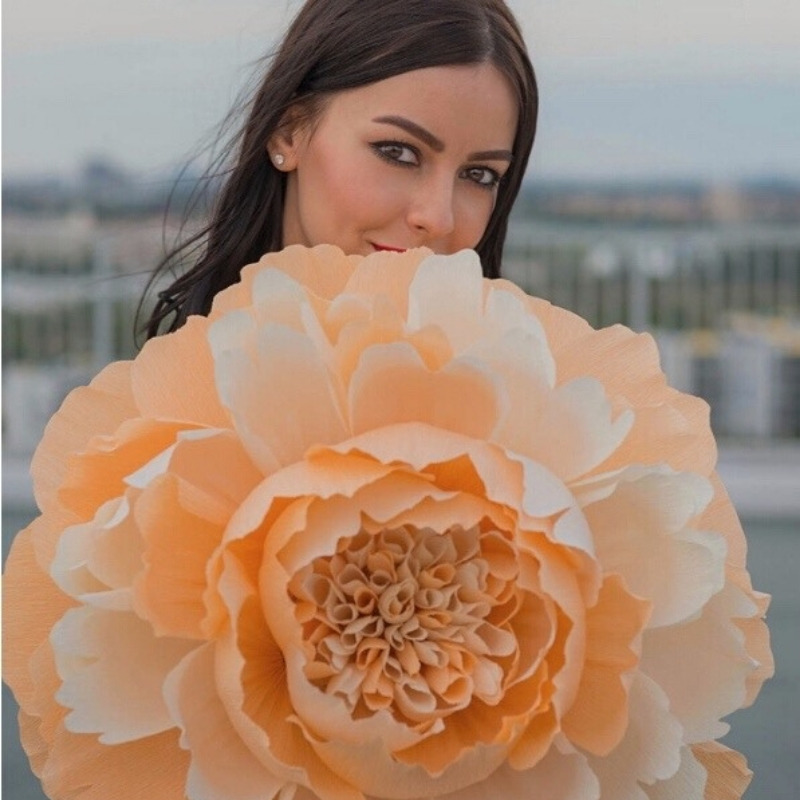
I want to show you how to make crepe paper petals for a giant peony and in general how to work with this material.
I will show you my stretching and shaping techniques so you can apply them not only to the giant peony but to any of your crepe paper flower projects.
For making crepe paper flowers, the best paper is the Italian paper Cartotecnica Rossi 180 gsm.
Italian crepe paper is ideal for making flowers of all sizes, from small to giant. It can be stretched up to 260%, which provides exceptional flexibility and the ability to hold any given shape.

Usually I use Italian crepe paper Cartotecnica Rossi 180 gsm or 140 gsm.
You can also use Chinese extra heavy crepe paper, but I want to warn you in advance that its ability to hold the shape is much worse than Italian paper has. So just keep that in mind.
If you don’t know yet about the types of crepe paper, how to choose the right paper for your project and where to buy it, I have a very detailed Crepe Paper Guide that you can easily download here, and it’s absolutely free.

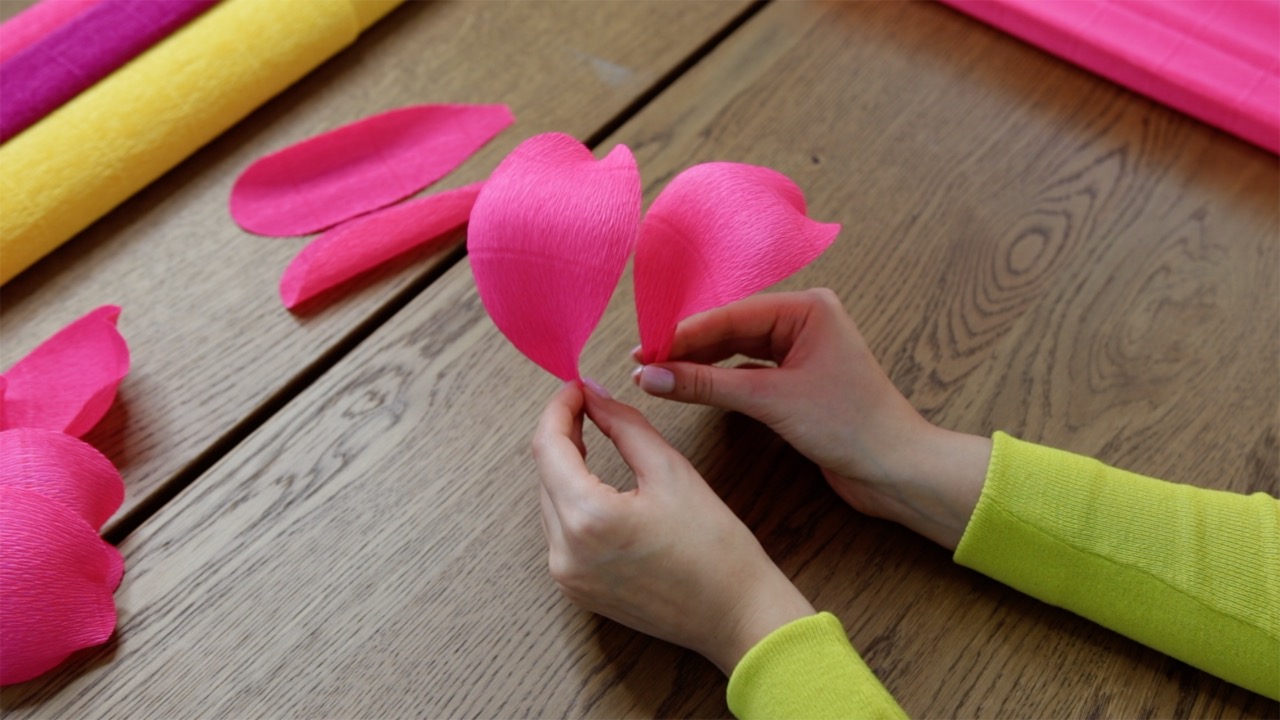
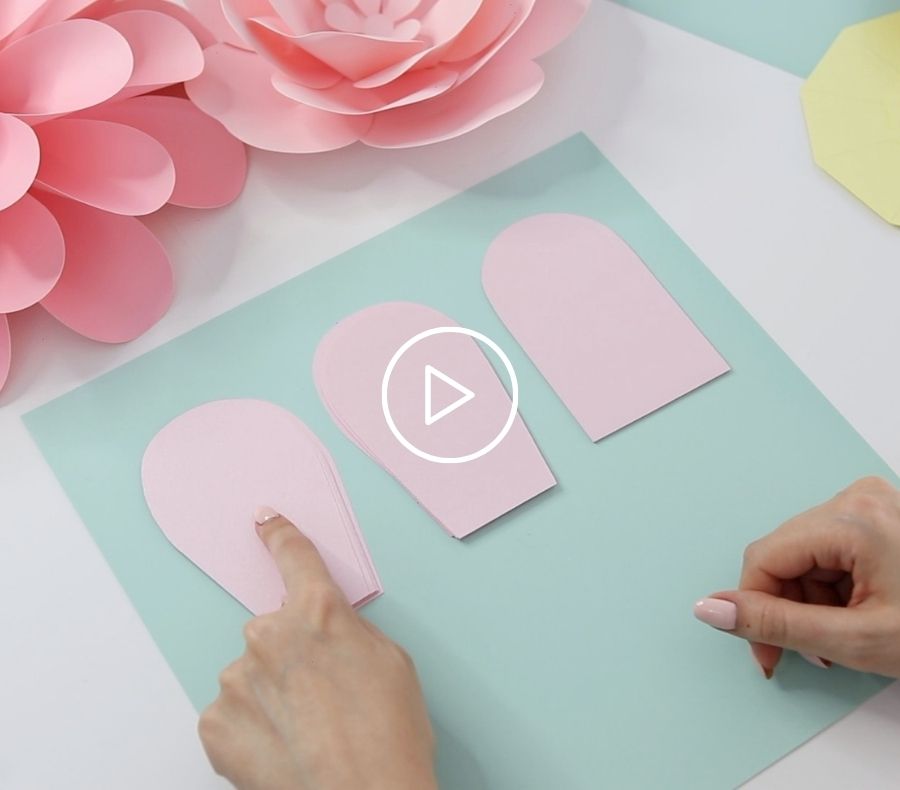
I cut a few strips of paper and then cut them into 3 parts. The exact sizes don’t matter here, because you will determine it depending on the size of your own flower.

Crepe paper has a very nice feature – it has machine lines that are really convenient because we can use them as a ruler.

The most common petal shape for peony is the drop shape. This is a simple and fine petal shape, and it’s very easy to cut out.
I usually take 2 blanks at once, but I don’t like to take more than 2 at a time, because, firstly, it will be difficult to cut many layers of paper at once, and secondly, the cut edge will not be neat and precise and I don’t want that for sure.
I fold the paper in half and start by cutting to the middle point, and from there, I begin to round off the top part of the petal. So this is how I get the drop shape.

Before stretching the petal, make sure you grab it right side up because you probably already know that crepe paper has a front and back side.
Maybe it’s not so important for the light colors but is quite noticeable on dark paper colors. Because the front side has a richer color than the back side.
Think in advance how your finished flower will look like. For example, If it’s an open flower (when you look at it from the front you will see more of the inside of the petals) then take and stretch the petals with the front side up. But if your finished flower will be more closed, so you will see more of the external side of the petals, then take and stretch them with the back side up.

You can also spot the front side by machine lines. They are curved outward on the front side and incurved on the back side.

I also prefer to stretch the petals 2 at a time. Because if you only stretch one petal, it’s very easy to overstretch the paper, especially if you don’t have experience working with crepe paper.
The overstretched paper will weaken and deform over time, and eventually, the finished flower will lose its original shape.
My first petals will be an example of a more closed petals, if you want to achieve a round-shaped peony.
So, I take them with my fingers and begin to smoothly stretch right in the middle. Please note, that I work more not with my thumbs, but with the rest of my fingers because I don’t want the rough marks from my thumbs.
So that’s how you get a nice and round petal shape.

I don’t touch and stretch the upper and lower parts of the petal. Because I want it to be as concave as possible.
With this technique, you get this very nice shape, petal looks a little bit like a heart.
Let me now show you with the second petal how you can overstretch the paper.
So I take a petal and start stretching it really hard, working more with my thumbs.
Look, you see these marks? This is overstretched paper which firstly doesn’t look nice at all and secondly will definitely lose its shape over time.

Ok, let’s move on to the next petals.
The same, I take 2 blanks and cut out the drop shape. In this case, I still want my petal to be more closed and concave, but at the same time, I want the top edge of the petal to be round, and not change its shape as in the previous petals. So here I stretch not only the middle part but also a little bit higher too.
Note that I am not stretching the very edge. And you never want to stretch the petal’s edge, it will not look good, trust me.

Look, this petal looks so nice and natural. I personally like it more than the first one, because I like more simple and clean shapes.
The heart-shaped petal looks a little bit sharp to me. But I know that many paper artists prefer this heart-shape to any others, so it’s definitely a matter of personal preferences.
Another mistake that you can make it’s when you cut the petal, you start by cutting till the middle, and then, instead of gradually round the shape, you continue to cut straight and round it only at the very top.
So when you will stretch the petal like this, it will be square on the top and it doesn’t look really nice.
If this is your original idea it’s fine, but if it’s not, just keep in mind that this can be a potential mistake.
Option #3. You can stretch the petal a little bit, and then gather the bottom edge and secure it with hot glue or a stapler. Or, if it’s a small petal, like mine, you can not fix it with anything, just gather the paper, make folds, and then glue it to the flower, so it will be fixed once it’s glued.

This method is best to use on very large petals as they are pretty heavy, so you want to make sure, that they will not lose their shape over time. And by fixing them like this, you add rigidity to them.
And the last thing I wanted to show you is how you can play with the petals look.
You can make them curly by applying two techniques.
So the first one – you take the petal and gently pull the paper in different directions with your fingertips. You can make as many pulls as you like. You can make just one pull in the center or make them along the entire edge of the petal, The petal will be really curly.

And the second technique, before stretching the petal, you fold the paper and twist it. And then stretch it as you like.
Many paper artists also love this technique because it gives a very interesting look to the petals.

But, please, keep in mind that even small modifications to your petals will change the whole look of the finished flower. But it’s always worth experimenting and see how you like it better.

I’m Oksana and I love paper flowers and all things paper. Here at FancyBloom I design new flower templates, make paper flower tutorials, and share my ideas and inspiration for fancy and modern craft.

10 Responses
So beautiful! Do you recall the name of the color of the paper you used? Will you be posting a tutorial to make the peony? Your work is so gorgeous. Thank you so much for pointing out important details!
Thank you so much Rosemary! Here I used Cartotecnica Rossi #951. And I promise to try to make a peony lesson😘.
Fantastic, I have watched hundreds of videos on how to make crepe flowers, I love the detail you give, and the explanations of how and why.
I wish I had found you earlier, it would have saved me probably a week of my life, and a lot of hair loss.
Really looking forward to viewing the rest of you videos, Many thanks and kind regards Jacqueline.
Hi Jacqueline, thank you sooo much for this kind feedback!🙏🏼 I’m so happy my information helped you figure some things out! Hugs🤗
Your flowers are so breathtakingly beautiful! I have love this tutorial, and I know you said size doesn’t matter, but can you give rough dimensions for someone who has never done it before? Thank you so much!
Hi Rosemary, thank you so much!🥰💖 In the video, I cut strips about 3-4 inches wide and then cut that strip into 3 pieces roughly about 6-7 inches long. I hope this helps you get started! Wish you good luck with your project!😘
Simplemente hermoso!!!
Cada vez que lo veo digo es natural!!!
Forward and success
Muchas gracias querida Pilar!💖
Thank you this was great. Very helpful and inspiring
Thank you, Joey! So glad it was helpful for you💕